Repository Manager View
- Copy Space for Confluence
- Ivan Senic
- Elias Schreiner
since version 1.4
The repository manager view is the view that enables the user to manage different CMR repositories, as well to perform different action on these repositories. By default the view is positioned at the left part of the inspectIT UI window. However, the user can freely re-position or close the view. To reopen the view again, please go to the Main Menu -> Window -> Show View -> Repository Manager.
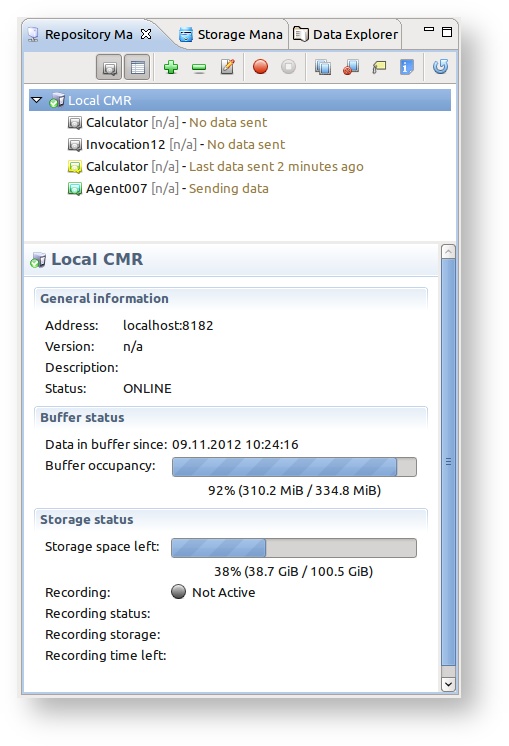
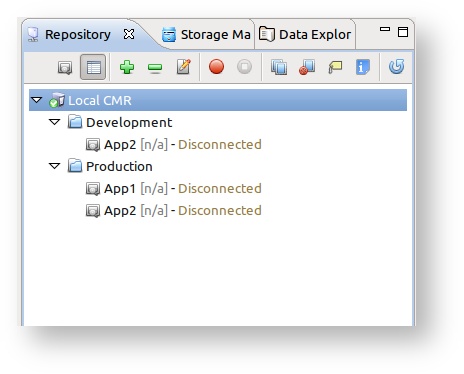
If you start inspectIT for the first time, a default repository will already be added to the repository manager. This repository is bounded to the http://localhost:8182. As you can see on the screen shot above if the repository is online, you will be able to see list of the agents registered on the repository. For each registered agent there is an information when the last data was sent:
| Icon | State | Description |
|---|---|---|
 | Not connected | Since the start of the CMR this agent was never connected. |
 | Connected :: No data sent | The agent is connected, but did not send any data yet. |
 | Connected :: Sending data | The agent is currently sending data. |
| Connected :: Last data sent ??? | The agent is connected, but it stopped sending data. There will be an information how much minutes passed since the last data sending. |
| Disconnected | The agent was connected since the start of CMR, but is currently disconnected. |
Auto-update
Note that information about the Agent status is auto-updated every 60 seconds, as well as all properties of the selected CMR.
The menu option Show/Hide Agents enables the user to show/hide all agents that have not sent any data since the CMR started. By default these kind of agents are hidden.
Additionally, in the bottom of the view properties of the CMR are displayed (properties panel can be turned off/on by clicking to the Show/Hide Properties  in the view menu):
- Name of repository
- IP Address repository is bounded to
- Description
- Current online/offline status
- Size of the database where long-term data is stored
- Up-time of the CMR
- Amount of free space in the repository buffer
- Date of the latest data in the repository buffer
- Amount of free space for the storage data on the hard drive
- State of the recording represented by flags
- Green flag - There are no problems.
- Yellow flag - Amount of data tried to be recorded is slightly higer than what CMR can support. However, no data loss should be expected.
- Red flag - Amount of data tried to be recorded is too high for CMR to manage. Data loss should be expected.
- If recording is active or scheduled for the repository
- Which storage is used for recording (if recording is active)
- Time left for recording (if recording is active and it's time limited)
Storage functionality
More info about recording, and new storage functionality in general you can find on page Working with disk storage.
Organizing the agents
from version 1.5
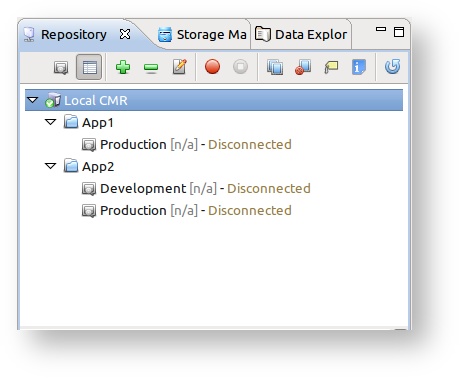
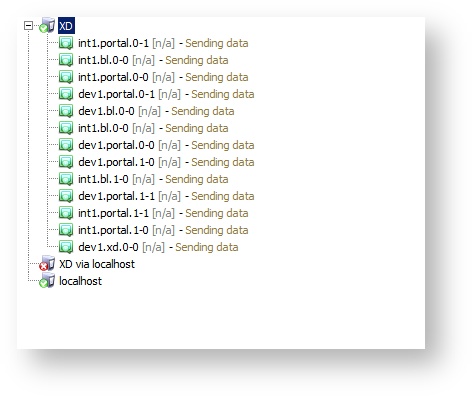
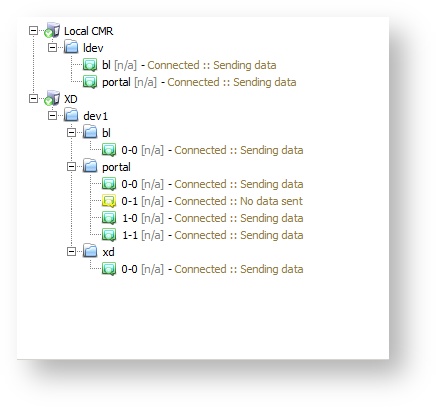
Since to one CMR many Agents can be connected at the same time, there are situations when due to the high number of the connected Agents it is necessary to organize Agents in the way they are easier recognized and accessible. To help in these situations inspectIT has added a new feature since version 1.5. With it, it's possible to organize agents by grouping them based on their name.
To easier explain the new feature, we will explain it on a simple example. Lets imaging that three agents are connected to one CMR:
- First agent is monitoring Application 1 in production
- Second agent is monitoring Application 2 in production
- Third agent is monitoring the Application 2 in development
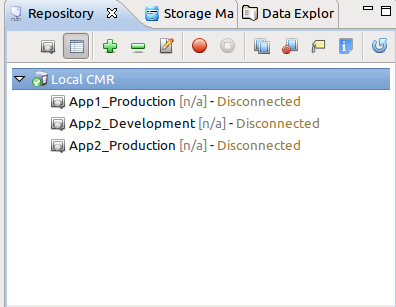
| Grouped by Application | Grouped by Prod/Dev |
|---|---|
|
|
|
|
| Old | New |
|---|---|
|
|
View data
Data one the repository can be explored by double-click on the wanted agent that is registered on the repository. This will directly open the Data Explorer View where all the monitoring data can be opened.
Manage repository
Add repository
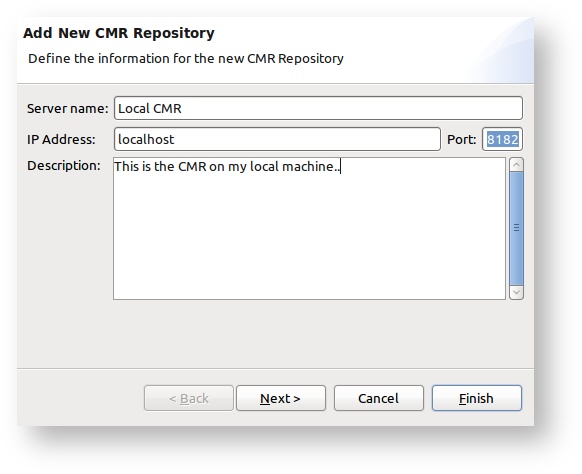
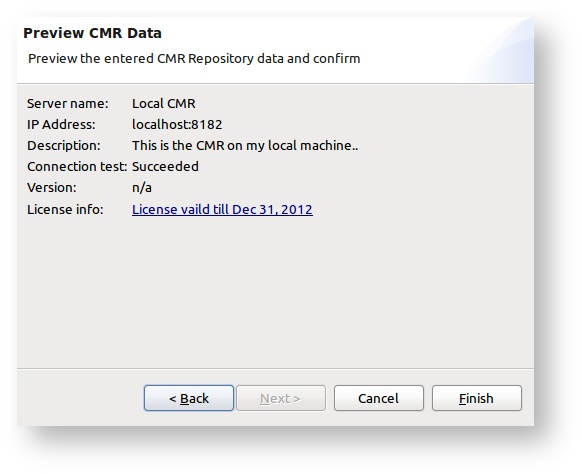
Adding a new repository can be executed by clicking on the Add Central Management Repository (CMR)  in the view menu. The wizard will be shown asking for the repository name, IP address and description. After providing the data and clicking Next, the confirmation page will appear displaying the information if the connection test to the provided CMR was successful. If so, in addition you can see the current license information for the CMR and you can directly import the license if one is needed.
Remove repository
Repository can be removed by clicking on the Remove Central Management Repository (CMR)  in the view menu.
Edit repository data
Repository data can be edited by clicking on the Edit repository  .
.
Use right-click menu
Note that the rick-click menu provides all possible actions that can be executed on the repository.
Actions on repository
Start/Stop recording
Repository manager view enables user to Start Recording  or Stop Recording
  on the remote repository. Recording is one of the new features in inspectIT version 1.4. More about recording you can read on the page Recording.
Copy Buffer to Storage
Copy Repository Buffer to Storage  is action that enables copying of the data currently in the buffer to new or existing storage. More details on this functionality you can read on the page Copy Buffer to Storage.
Clear Repository Buffer
As described in Working with the in-memory storage article, inspectIT stores most of the monitoring data in memory buffer. Action Clear Repository Buffer  deletes all data that is stored in the memory-buffer on the selected CMR.
Manage Labels
Since storages can be "labeled" with different values (assignee, status, rating, use case,..), CMR repository will save the information about the custom label values used over time. For example, once entered assignee "Max Musterman" or use case "Shopping Card Checkout" will be saved on the CMR, and easily assignable to any storage as a label. However, from time to time it is necessary to delete label values that are not used any more (assignee left the project, use case not valid any more,..). Complete managing of the labels values is available in via Manage Label wizard, that can be started by clicking on the Manage Labels on Repository  action. Manage Label wizard also enables users to add new label types. More about labeling storages functionality ca be read on page Storage labeling.
Configure Repository
from version 1.6
Configuration of the repository can be done by opening the  Configure Repository dialog. More information about CMR properties and configuration can be found on the CMR Configuration.
Restart and Shutdown
from version 1.5
From the Repository Manager View it´s also possible to restart or shutdown the selected repository by executing Restart CMR  or Shutdown CMR
  actions.
Actions on agents
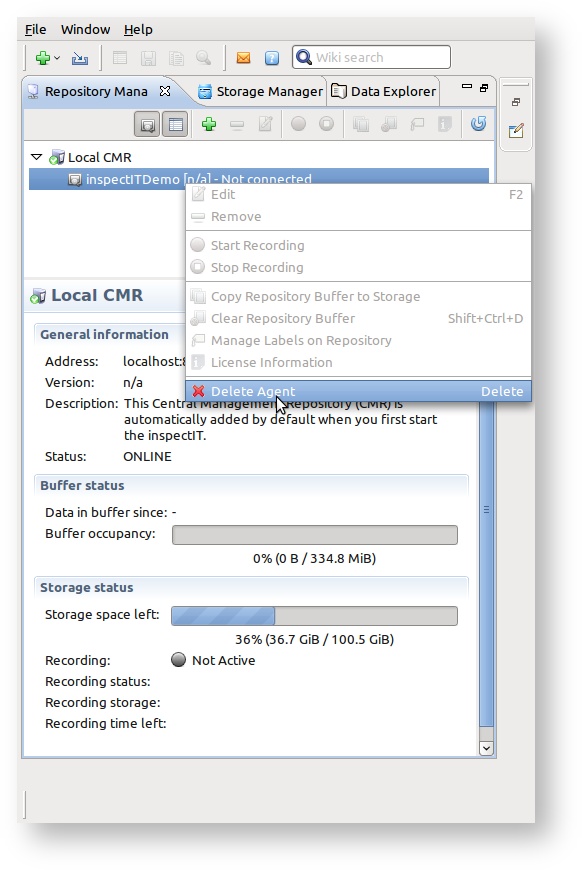
Delete the agent
The agent can be deleted from the repository by right-clicking on the wanted agent and selecting Delete Agent  option. The deletion of the agent is possible in two situations:
- If the agent is in the "never-connected" state, meaning that since the restart of the CMR the agent was not connected to the CMR again.
- If the agent is disconnected. Note that if the monitoring application is terminated, the agent should send the disconnect signal to the CMR.
When agent is deleted from the CMR all related data about the agent is deleted from the database. Note that all opened views displaying the data from the agent to be deleted will be closed.