Calculator Example
- Copy Space for Confluence
- Elias Schreiner
- Ivan Senic
The calculator example is the most simple example of how inspectIT can be integrated with an application. The calculator is a simple java-based application consisting only of one class. This tutorial helps to understand the relations between the inspectIT components with this simple example.
The calculator class
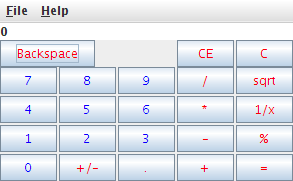
The calculator - as the name suggests - provides a simple Java-based realization of a calculator. The following illustration shows the basic layout of the Calculator (note that methods were omitted for clarity). The method actionPerformed is called by the UI when the user clicks on a button (add, substract, ...). Internally this call is dispatched to the calculating methods (multiply, divide, ...). Please find the complete code of the SimpleCalculator attached to this page. You can easily download the java source here: Calculator.java
info.novatec.inspectitsamples.calculator

public class Calculator extends JFrame implements ActionListener {

	public Calculator() { [...] }

	public void actionPerformed(ActionEvent e) { [...] }

	private double multiply(double a, double b) { [...] }
	private double divide(double a, double b) throws DivideByZeroException { [...] }
	private double substract(double a, double b) { [...] }
	private double add(double a, double b) { [...] }

	[...]
}

class DivideByZeroException extends Exception { [...] }
Setting up inspectIT
Copy and extract the inspectit releases (For this example I assume that you are using the agent for Java 5 or above) to a location on your disc. For this example I used the folder /data/inspectit to keep all inspectIT releases there. For easy understanding of the structure different folders are created (note that you can do this as you like).
Sample folder structure
Folder | Description |
|---|---|
/data/inspectit/agent | The base folder of the agent containing the inspectit-agent.jar archive |
/data/inspectit/configurations/calculator | This folder contains the agent configuration (inspectit-agent.cfg) that will be used to instrument the calculator sample. A template of the file inspectit-agent.cfg is provided with each agent release. |
/data/inspectit/CMR | The base folder of the CMR |
/data/inspectit/inspectit | The base folder of the user interface |
Starting the CMR
The first thing to do is to start up the CMR (the inspectIT server). A startup script is directly provided with the CMR release. Navigate to your CMR installation and execute the startup script.
Integrate the inspectIT agent
The inspectIT agent is integrated with the startup script of the calculator. You can find the startup of the calculator without inspectIT here.
java -javaagent:/data/inspectit/agent/inspectit-agent.jar -Dinspectit.config=/data/inspectit/configurations/calculator -cp bin info.novatec.inspectitsamples.calculator.Calculator
As you see enabling inspectIT is only about integrating two additional options to your startup script of the java application. Do not start your calculator yet, because we have not yet defined any sensors.
Configure the inspectIT agent
The inspectIT agent is configured by means of a simple configuration file. For this sample, do not use the template that was provided with the agent release (at first). We will create our configuration from scratch. Please also refer to the Agent Configuration section for in detail information about the configuration possibilities with inspectIT. For the following chapters it is assumed that you start with an empty file called inspectit-agent.cfg. Save this file to your configuration folder (we used for this example /data/inspectit/configurations/calculator.
Defining the repository and sending/buffers
The first thing to do is to define the location of the CMR (to be more exact the socket the rmi registry is running on). Add the following lines to your configuration file and adapt the IP and port as you see fit. For the most basic setup where you have the CMR running on your computer you can simply use 127.0.0.1.
repository 127.0.0.1 9070 CalculatorAgent
After having defined the location of the CMR we configure the agent to use certain basic sending and buffering strategies:
send-strategy info.novatec.inspectit.agent.sending.impl.TimeStrategy time=5000
buffer-strategy info.novatec.inspectit.agent.buffer.impl.SimpleBufferStrategy
Now we will define the sensor types that we will use for our calculator instrumentation (note that we did not include all possible sensor types. For example we did not add database tracing at all, which is a very important feature of inspectIT!). We only use the Timer sensor and the Invocation Sequence .
method-sensor-type timer info.novatec.inspectit.agent.sensor.method.timer.TimerSensor MAX
method-sensor-type isequence info.novatec.inspectit.agent.sensor.method.invocationsequence.InvocationSequenceSensor INVOC
In addition we activate the Platform sensors for the application
platform-sensor-type info.novatec.inspectit.agent.sensor.platform.ClassLoadingInformation
platform-sensor-type info.novatec.inspectit.agent.sensor.platform.CompilationInformation
platform-sensor-type info.novatec.inspectit.agent.sensor.platform.MemoryInformation
platform-sensor-type info.novatec.inspectit.agent.sensor.platform.CpuInformation
platform-sensor-type info.novatec.inspectit.agent.sensor.platform.RuntimeInformation
platform-sensor-type info.novatec.inspectit.agent.sensor.platform.SystemInformation
platform-sensor-type info.novatec.inspectit.agent.sensor.platform.ThreadInformation
Assigning method sensors to the application
After we have now defined which sensor types can be used, we can use these sensors and assign them to concrete methods of the application. Imagine that we want to have an invocation sequence that covers each and every action the user is doing within the calculator. As described, the method actionPerformed of the calculator is used as by the presentation logic to call the business logic, so this is a suitable location to define the invocation sequence on.
In addition to that we want to see the execution times of each and every methods within the Calculator class. Note that this approach is not feasible for larger applications as way too many measurements would be gathered. So keep in mind that you should place sensors carefully within your application.
sensor isequence info.novatec.inspectitsamples.calculator.Calculator actionPerformed
sensor timer info.novatec.inspectitsamples.calculator.Calculator *
Analyzing the application
After inspectIT is now completely set up, you can start the application and use the inspectIT Client to inspect the application.
Using additional features
Use parameter capturing
In order to know the parameters the actionPerformed method was called with, one can integrate parameter capturing.
sensor isequence info.novatec.inspectitsamples.calculator.Calculator actionPerformed p=0;Source; f=LastOperator;lastOperator f=LastOutput;jlbOutput.text
sensor timer info.novatec.inspectitsamples.calculator.Calculator *
Activate exception tracing
Add the exception sensor to the list of active sensor types:
method-sensor-type timer info.novatec.inspectit.agent.sensor.method.timer.TimerSensor MAX
method-sensor-type isequence info.novatec.inspectit.agent.sensor.method.invocationsequence.InvocationSequenceSensor INVOC
exception-sensor-type info.novatec.inspectit.agent.sensor.exception.ExceptionSensor mode=enhanced
Then instrument what type of Exceptions should be traced. In this example we will activate instrumentation of all exceptions by using the '*' wildcard:
exception-sensor *
More information about Exception sensor and different instrumentation options you can find on the Exception Sensor page.
Startup / Compilation of the calculator example
It is assumed that the following structure is used for the calculator
- [INSPECTIT:Root]
- src/
- info.novatec.inspectitsamples.calculator.Calculator
- bin/
- src/
[...]SimpleCalculator/src$ javac info/novatec/inspectitsamples/calculator/Calculator.java -d ../bin
java -cp bin info.novatec.inspectitsamples.calculator.Calculator
Problems and solutions
Problem | Solution |
|---|---|
The agent cannot contact the CMR | |
Other problems | Use the search possibility of this Wiki, search the FAQ or contact the inspectIT team (please do it in this order) |