What is sensor assignment
Sensor assignment specifies the process of mapping/assigning an already existing sensor type to a concrete method of a certain class. The sensor type itself is the definition of what needs to be measured. Sensor assignment thus defines what should be monitored. The currently existing sensor types in inspectIT are:
- Timer sensor
- HTTP sensor
- Exception sensor
- JDBC Connection sensor
- JDBC Statement sensor
- JDBC Prepared Statement sensor
- JDBC Prepared Parameter sensor
- Logging sensor for log4j
- Invocation Sequence sensor (although this sensor type exists it can not be assigned directly, please check the Advanced sensor options below for more information)
Configuration
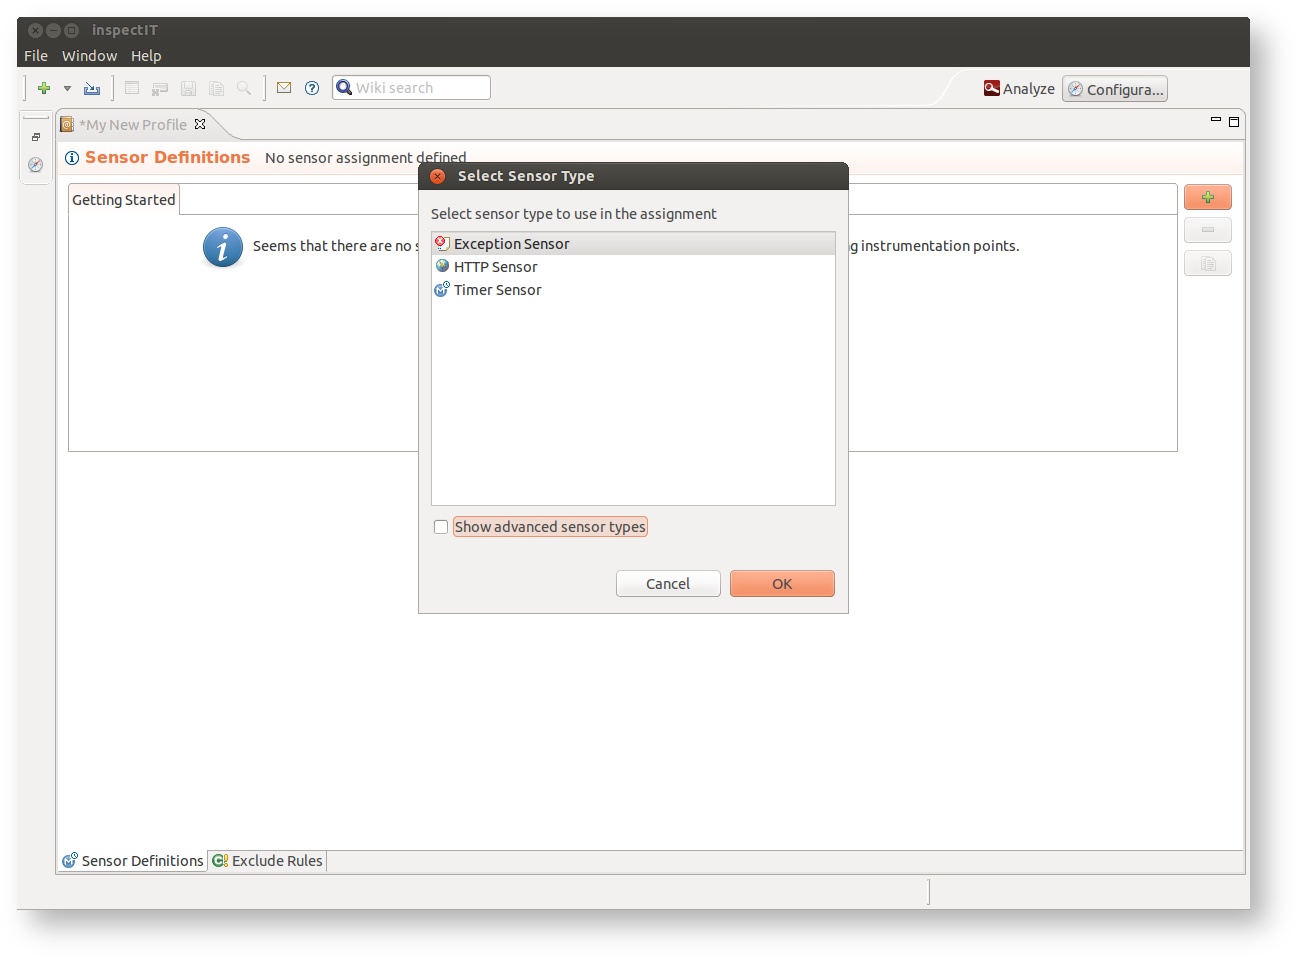
Sensor assignment configuration is done on the Sensor Definitions page of the profile. The sensor definition page offers the Add, Remove and Duplicate sensor assignment options. When adding new sensor assignment to the profile, first step is to select sensor type you want to use in the given assignment:
Note that in most cases for the user it only makes sense to add assignments for the Timer sensor, HTTP sensor or Exception sensor. The other sensor types are considered as advanced and are available for selection upon checking the Show advanced sensor types in the Select Sensor Type dialog.
Depending on the selected sensor type there are one or more configuration parts for each assignment:
- Class definition
- Method definition
- Annotation options
- Sensor specific options
Wildcards
The wildcard * can be used to match any length of characters. An example for a package definition could be: *novatec* which will catch every package which contains the keyword novatec. Wildcards can be used for all the fields where a class, method, annotation or parameter name must be enetered. When defining a sensor assignment using wildcards usually multiple assignments are created by the agent.
Class definition
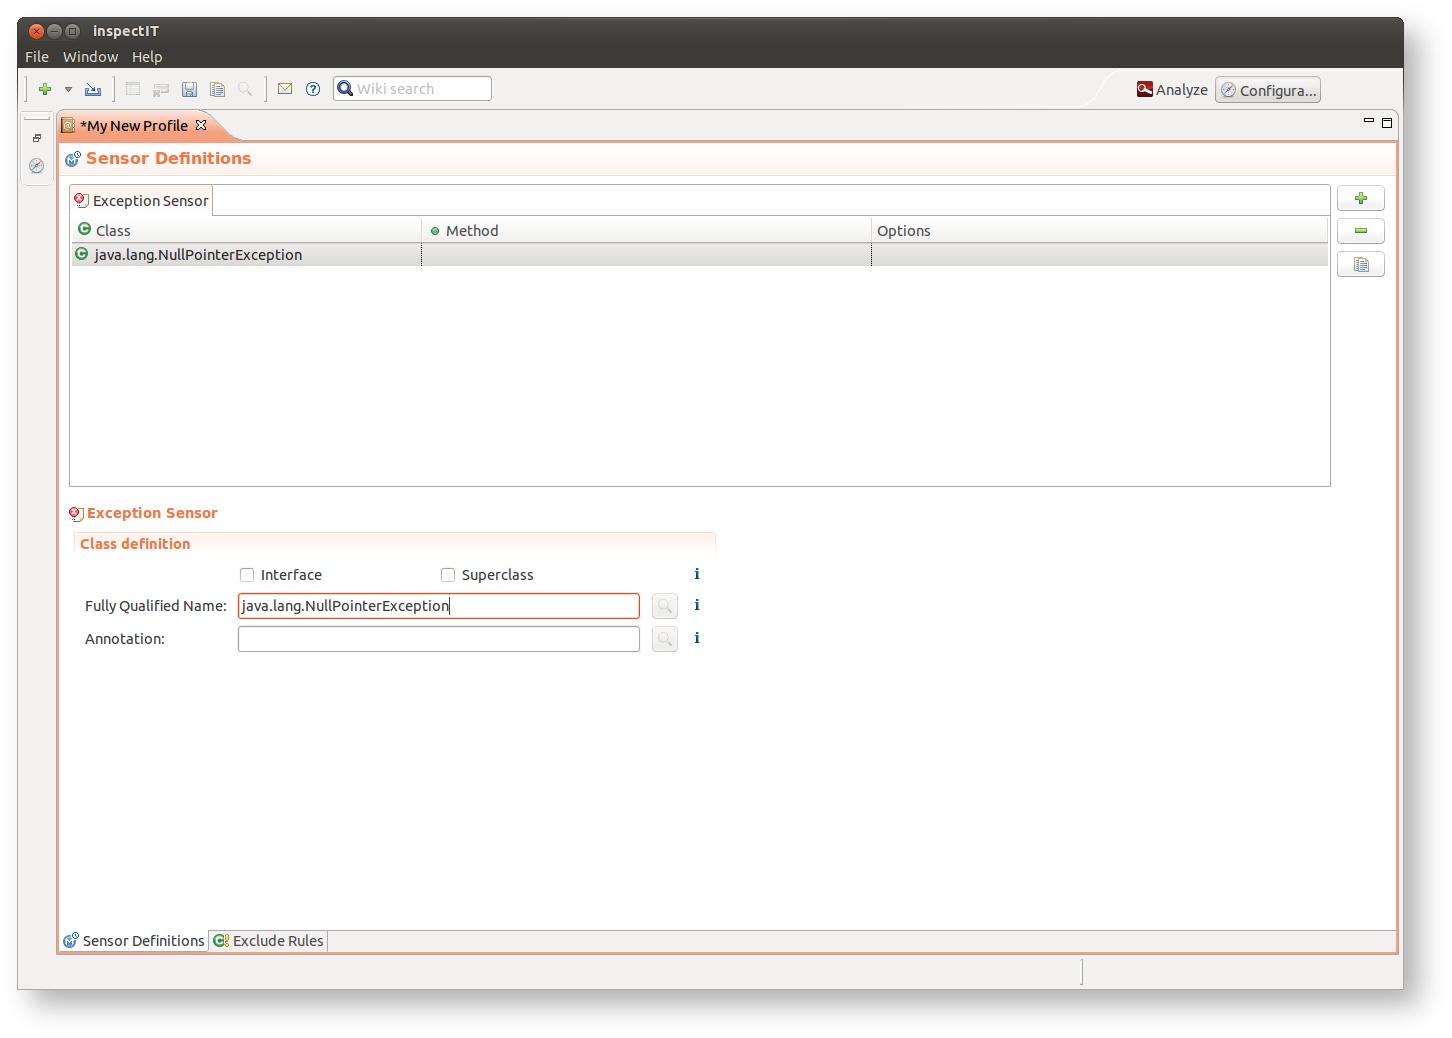
Easiest way to define the assignment is to define the fully qualified name of the class that should be monitored (with or without the wildcard character). The following example shows assignment of the Exception sensor to the java.lang.NullPointerException:
Super-classes and interfaces
Often the instrumentation should include classes that realize specific interfaces or extend certain super-classes. For most software projects a well-defined interface defines (for example) the basic structure of a service. All services within this project will have to realize this interface. In order to not having to include each and every service manually, the performance analyst can use the options interface and super-class to define that all classes should be instrumented that extend some super-class or realize an interface.
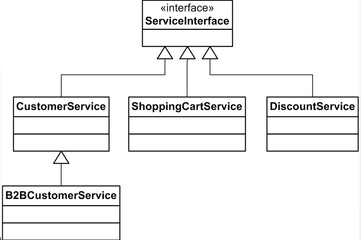
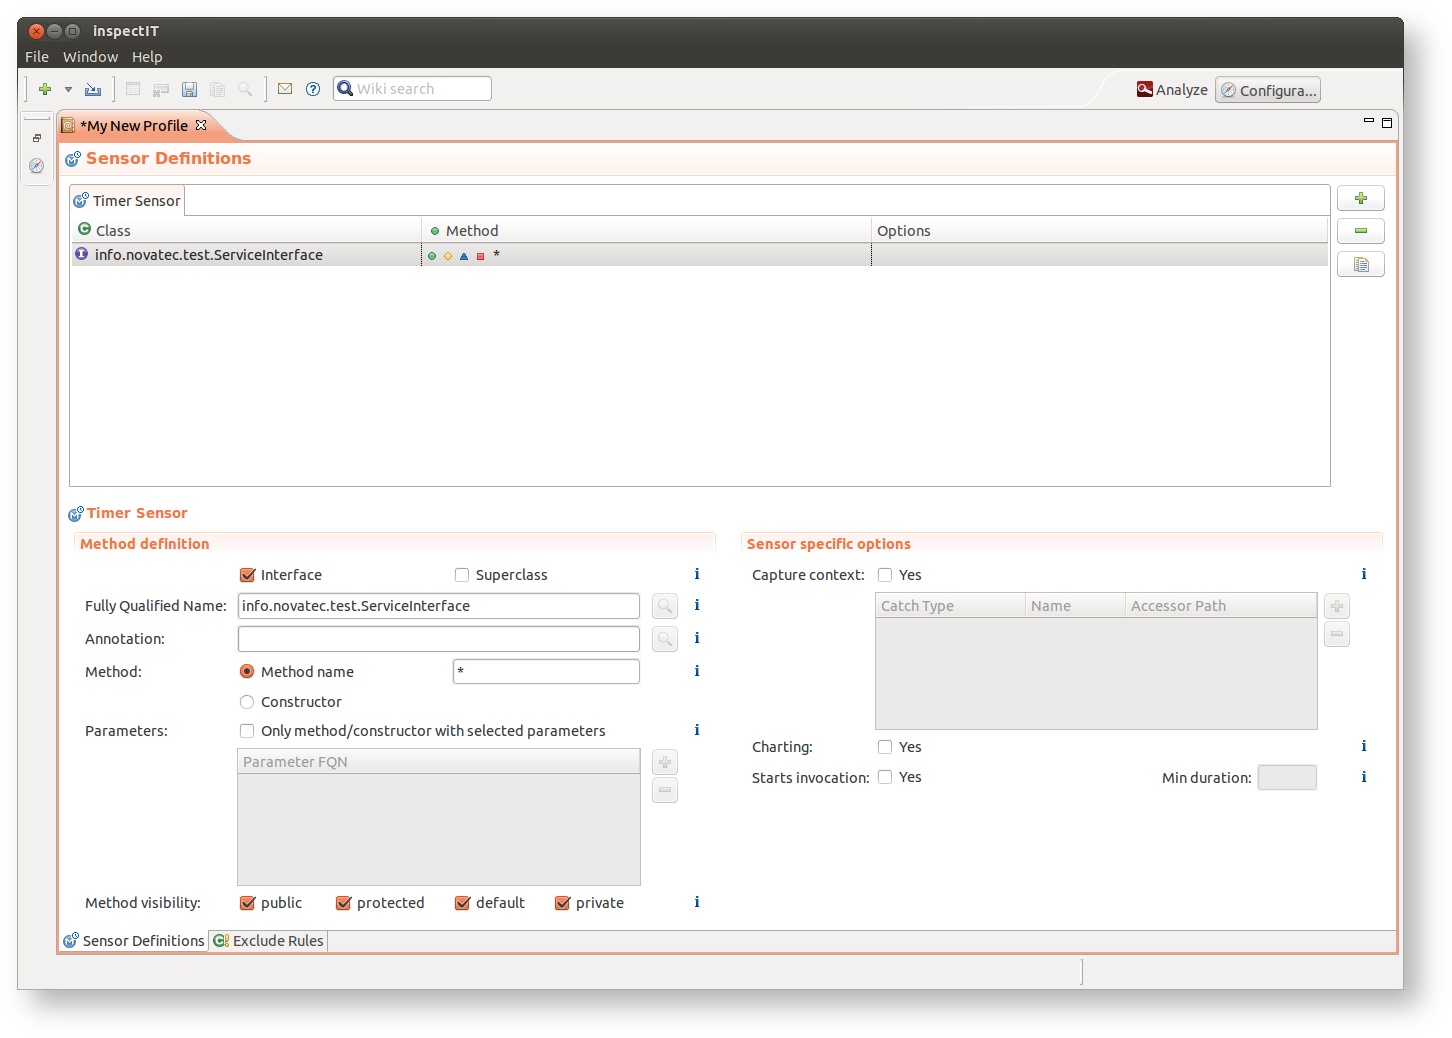
Consider this class hierarchy. All services within the application realize (directly or indirectly) the interface ServiceInterface. In order to monitor the execution times all possible services within the application, it is easier to specify the interface that all services realize.With inspectIT you can use the following instrumentation to instrument all classes that realize the interface (in this example we define a timer on all methods of the realizing classes. We assume that the ServiceInterface is defined in the package info.novatec.test):
Notice that the class definition is representing the interface, but the methods to be instrumented are referring the implementation class, not the interface. Thus using * here does not only instrument the methods the interface defines but all methods that a class realizing the interface has.
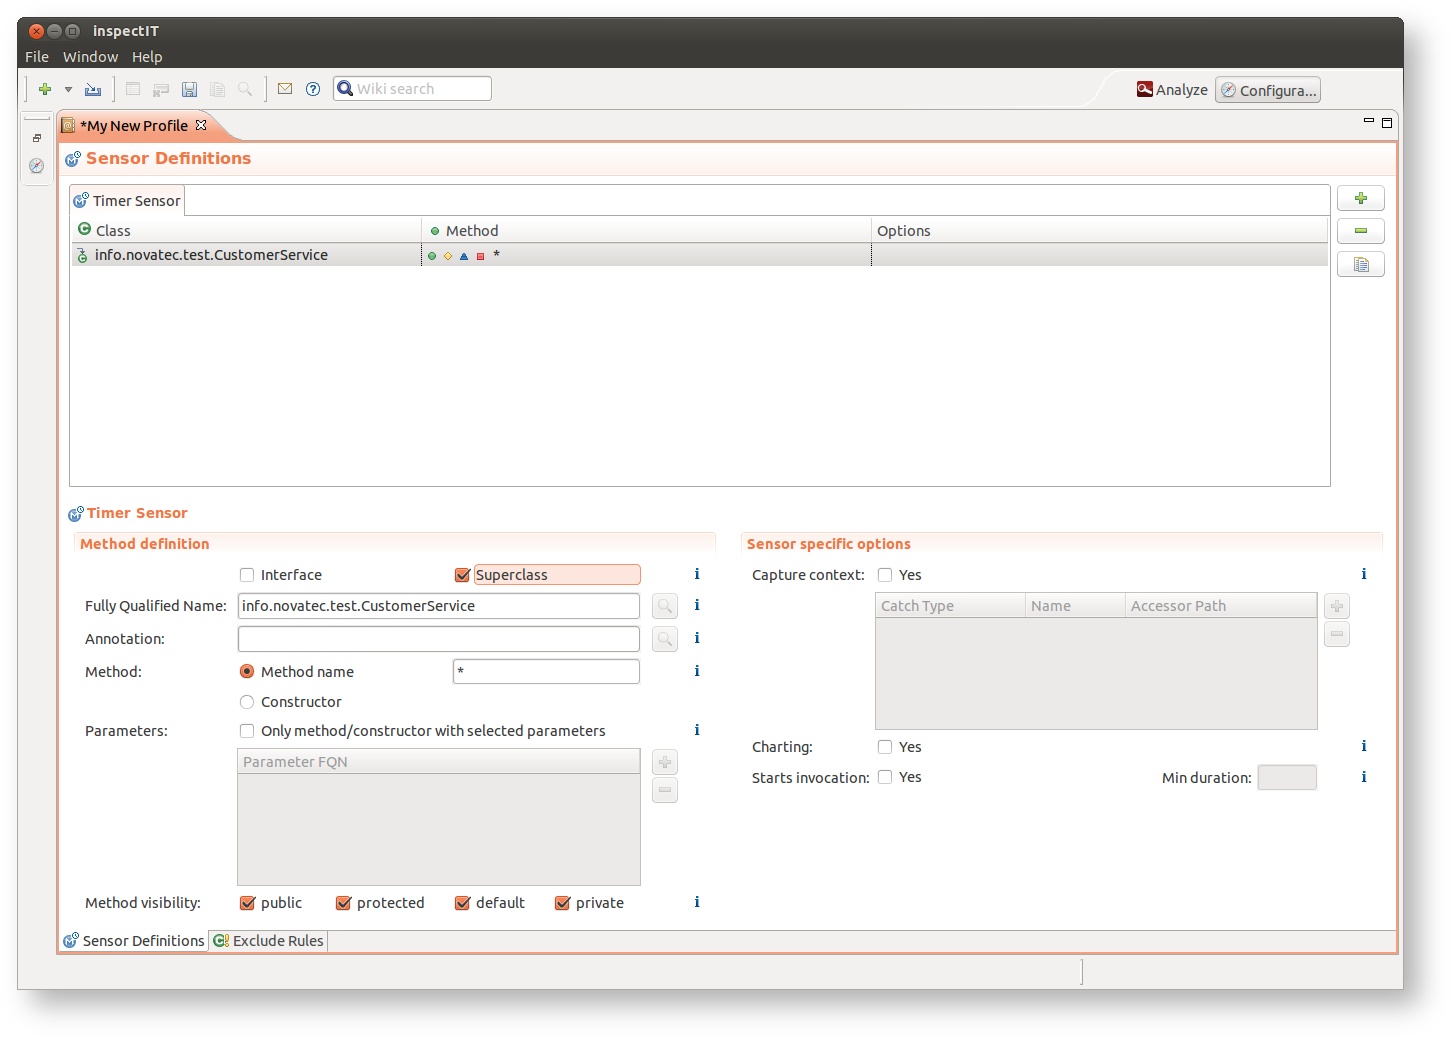
In the following example all sub-classes of CustomerService are instrumented:
Inner classes
Inner classes can be easily instrumented with inspectIT. Just use the standard naming schema [enclosingclass]$[Innerclass]
Method definition
If the selected sensor type is type that is method sensor type, then beside class definition the user can define exact methods to be monitored. There are two possible options:
- Define the method name (with or without wildcards)
- Select the constructor to be monitored
In addition exact parameters of the method can be specified, which can be helpful in filtering when the class has many method with the same name. If parameters are left out then all methods with the given name will be instrumented, regardless on number/type of parameters. Note that parameter order is taken into account.
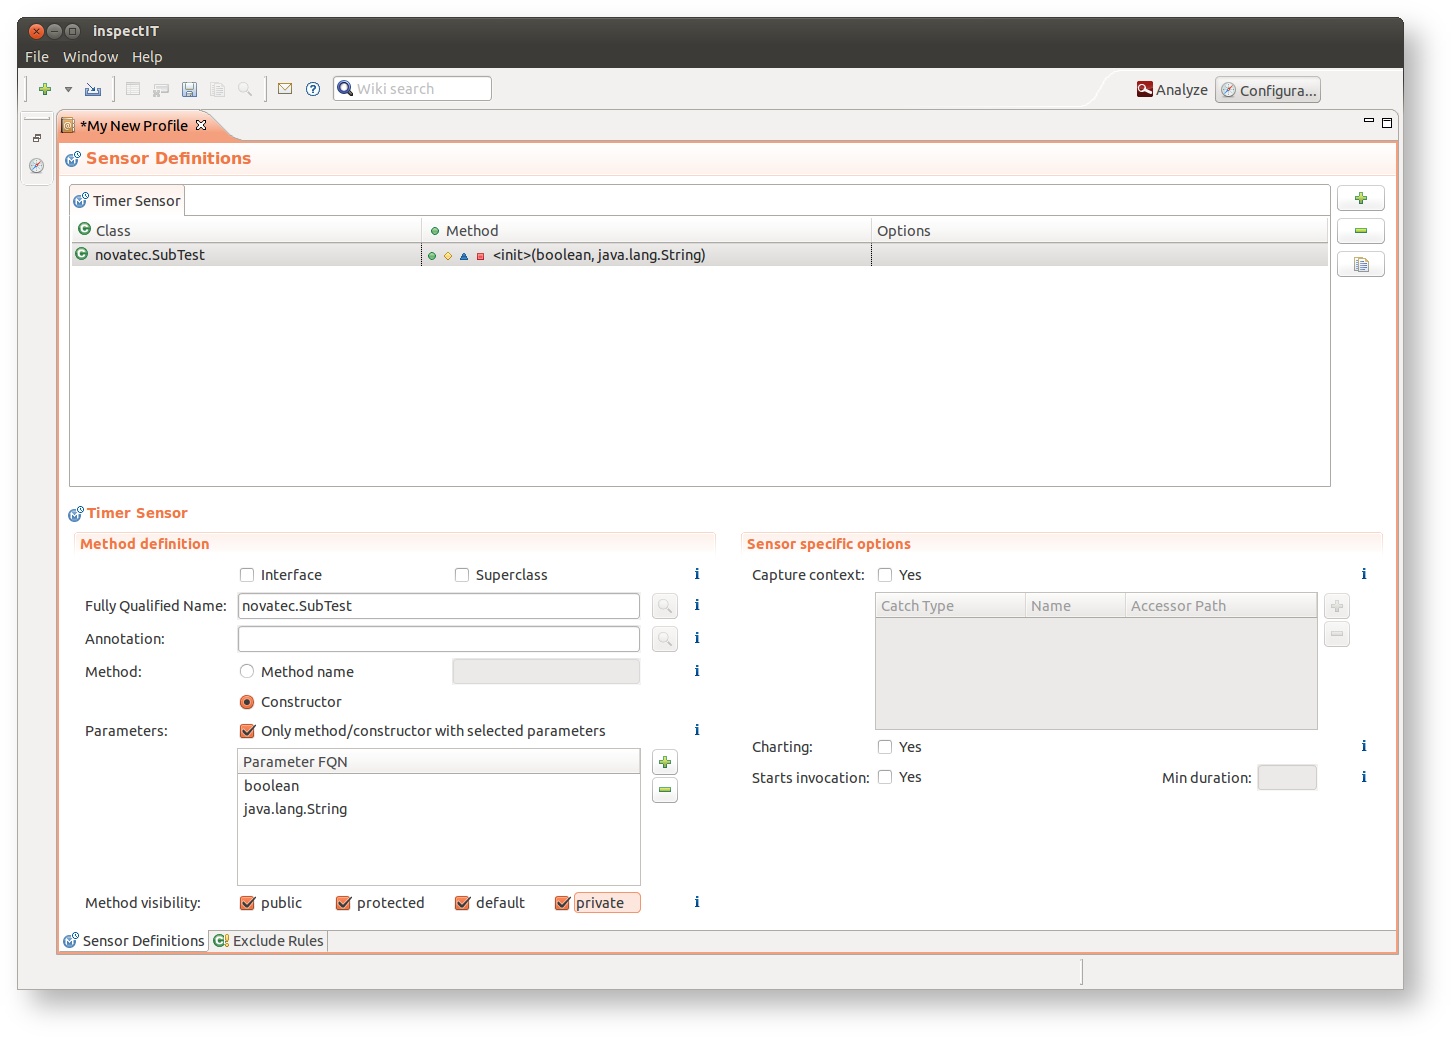
The following example show a instrumentation configuration for the constructor of the class novatec.SubTest that has boolean and java.lang.String as parameters:
Be careful when using constructor instrumentation
Constructor instrumentation is different than method instrumentation. Not only because of the implementation in the Agent itself, but of how the JVM is executing them. If a class contains one constructor (one is always there, no matter if the user implements it directly or not) which does not more than just initializing some variables or setting some fields, then the constructor instrumentation works as expected. But problems arise if a constructor calls another constructor (through this or super) which is instrumented.
The user would expect that the inspectIT Agent record constructors calling other constructors it like in methods: That is if constructor A executes constructor B, then the invocation tracer for example will visualize it that way. That is NOT true for constructors. The problem here is that the this or super calls must remain ALWAYS as the first call. This is a limitation of the JVM which cannot be avoided.
| Real call tree |
|---|
Method A (Class X)-->Constructor A (Class Y)----->Constructor B (Class Z)-------->Constructor C (Class Z) |
| Shown in inspectIT |
|---|
Method A (Class X)-->Constructor C (Class Y)-->Constructor B (Class Z)-->Constructor A (Class Z) |
The user thinks that Method A creates 2 new instances of Class Z and 1 new instance of Y, first calling constructor C, then B and last A. The worst part here is now that the Timer records the time for each constructor whereas each of them is correct, but in the context of an invocation tracer, the exclusive time could not be calculated correctly anymore. Because Constructor A is the only time that should be subtracted from method A, but instead, C, B and A are subtracted.
Instrumentation based on modifiers
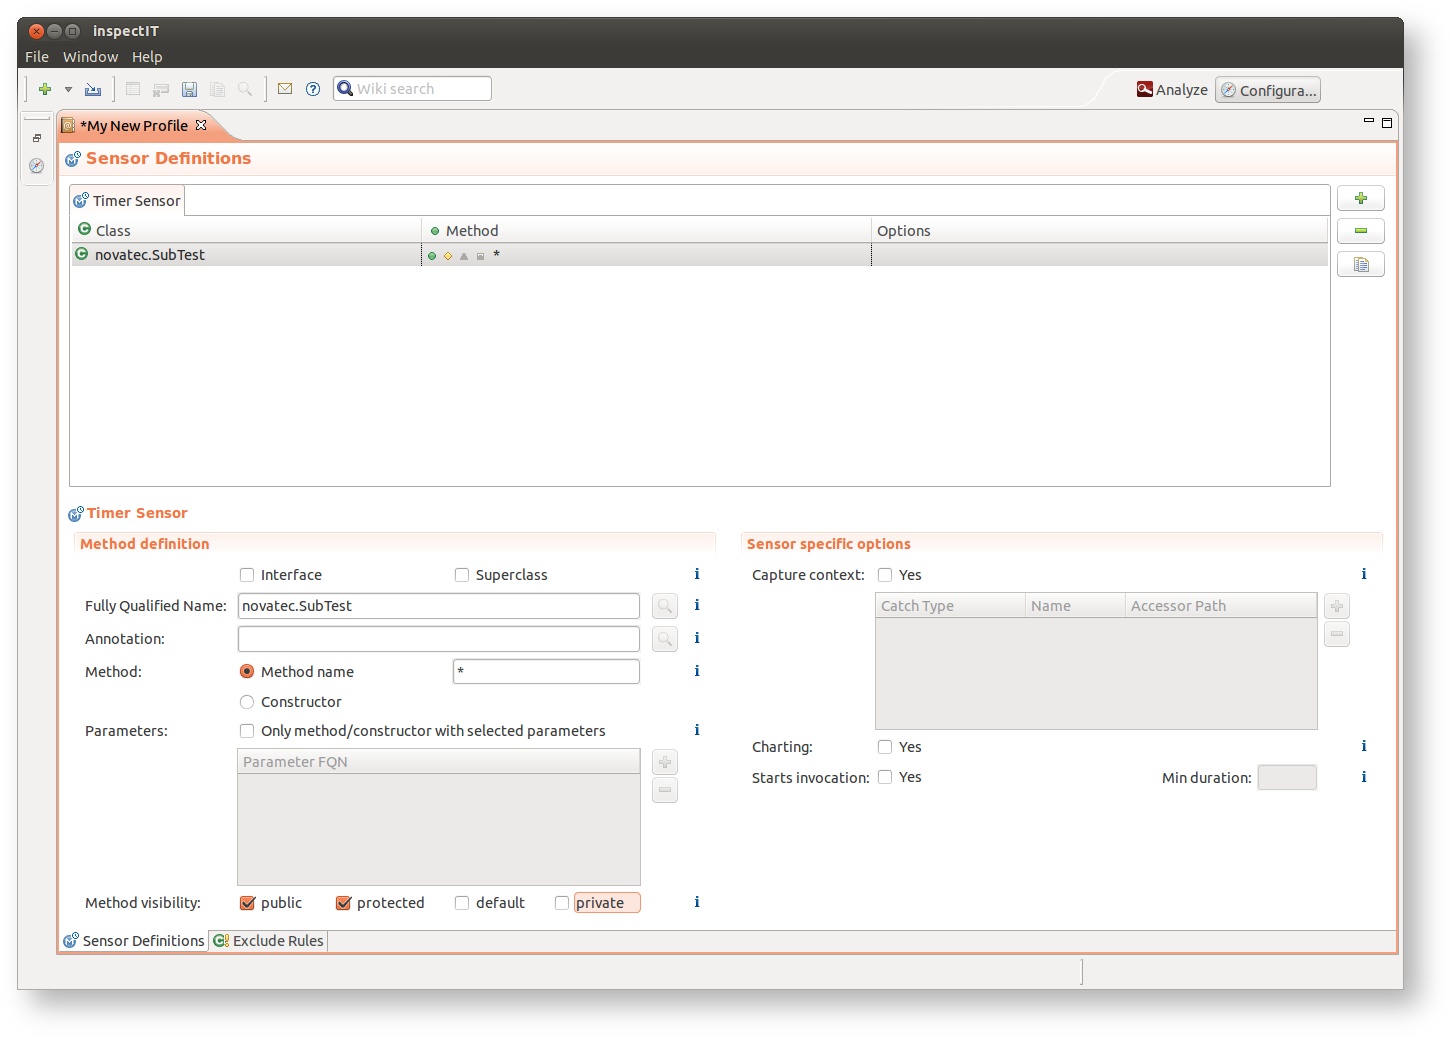
The additional options of the method definition can include the definition of the method/constructor visibility modifier(s) that should be instrumented. Thus, the methods can be additionally filtered by the visibility modifier that can be: public, protected, private or default. The usage of this option looks like following:
This instrumentation line will instrument all the public and protected method of novatec.SubTest class.
Annotation options
Sensor assignment can include the special additional option, where an annotation can be specified and used as additional instrumentation filter. If the annotation is defined in the Annotation field, the agent will instrument the methods/constructors based on the annotation target:
- If the annotation target is Class, then all methods from the classes that have the specified annotation will be instrumented.
- If the annotation target is Method, then only methods that have the specified annotation will be instrumented.
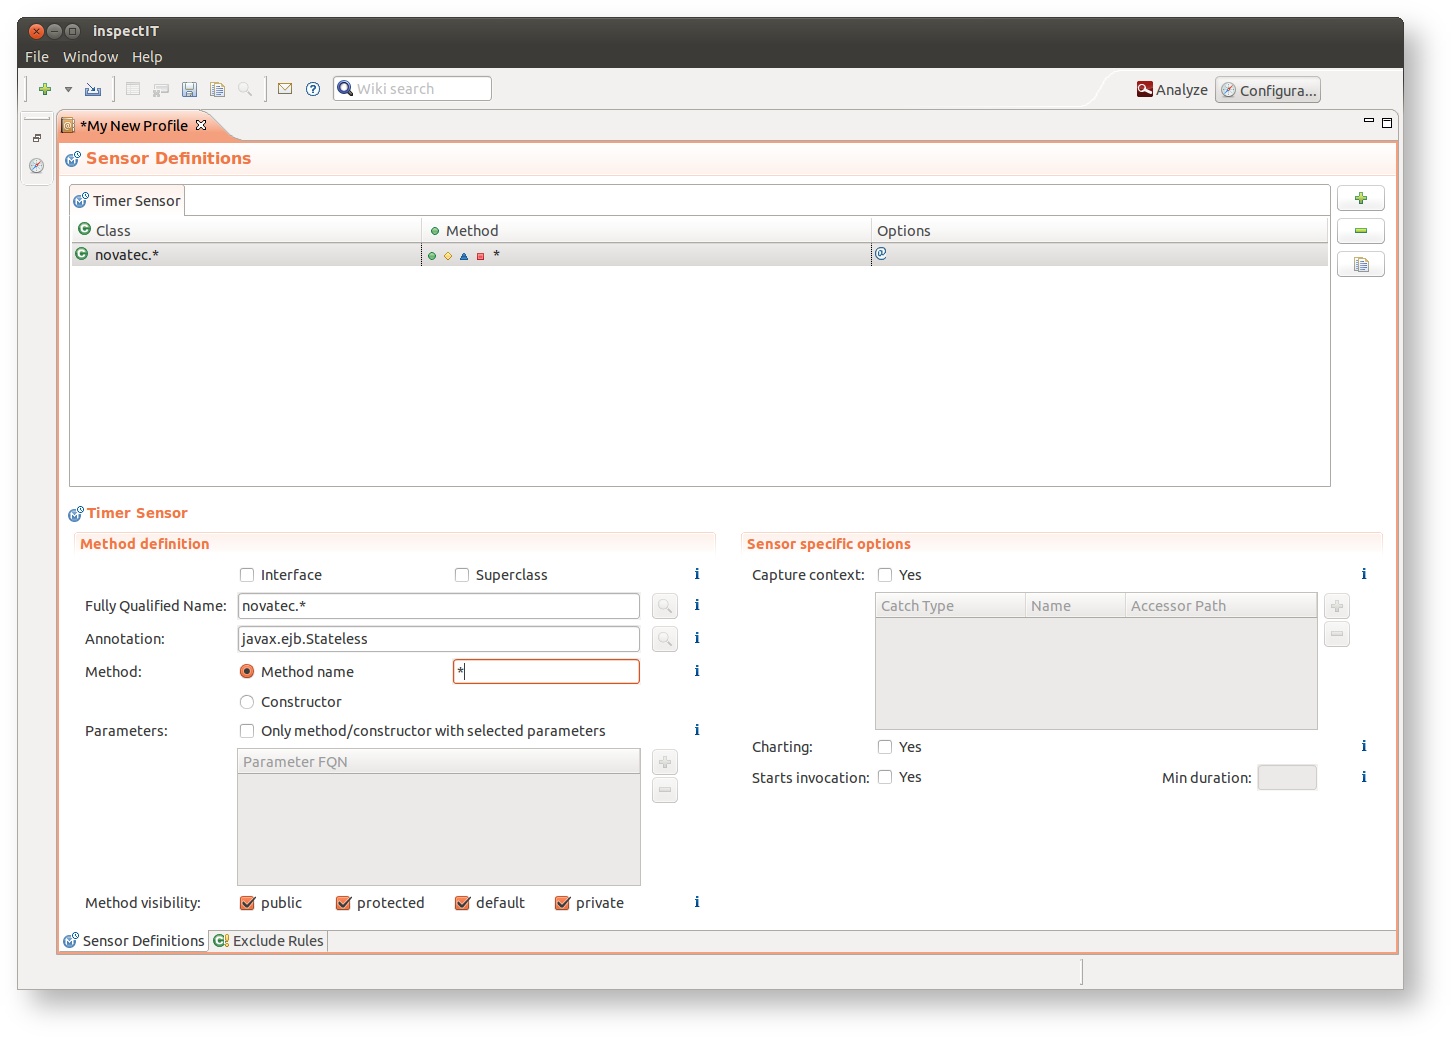
The usage of the annotation option is:
This line will instrument all methods of all classes in novatec.* package that have been annotated with Stateless annotation.
Annotation based instrumentation can be combined with all other instrumentation options. If the annotation option is used the Options column of the sensor assignment table will display this icon: .
Annotation class not needed on the class-path
The annotation class that is used in the instrumentation does not need to be on the class-path in order for instrumentation to work.
Sensor specific options
Starts invocation
Applies to Timer sensor
As already mentioned the Invocation Sequence sensor can not be applied directly to sensor assignment. Instead of this you can mark any Timer sensor assignment to start the invocation as well as capturing the timing information. This is done by activating the Starts invocation option in the assignment sensor specific options. It's possible to optionally also set the minimum duration property. This property defines the minimum time an invocation has to consume in order to be saved and transmitted to the server. This helps in reducing the data load from the Agent to the CMR and is a good filter for not so important invocations.
If the starts invocation is active the Options column of the sensor assignment table will display this icon: .
Charting
Applies to Timer and HTTP sensor
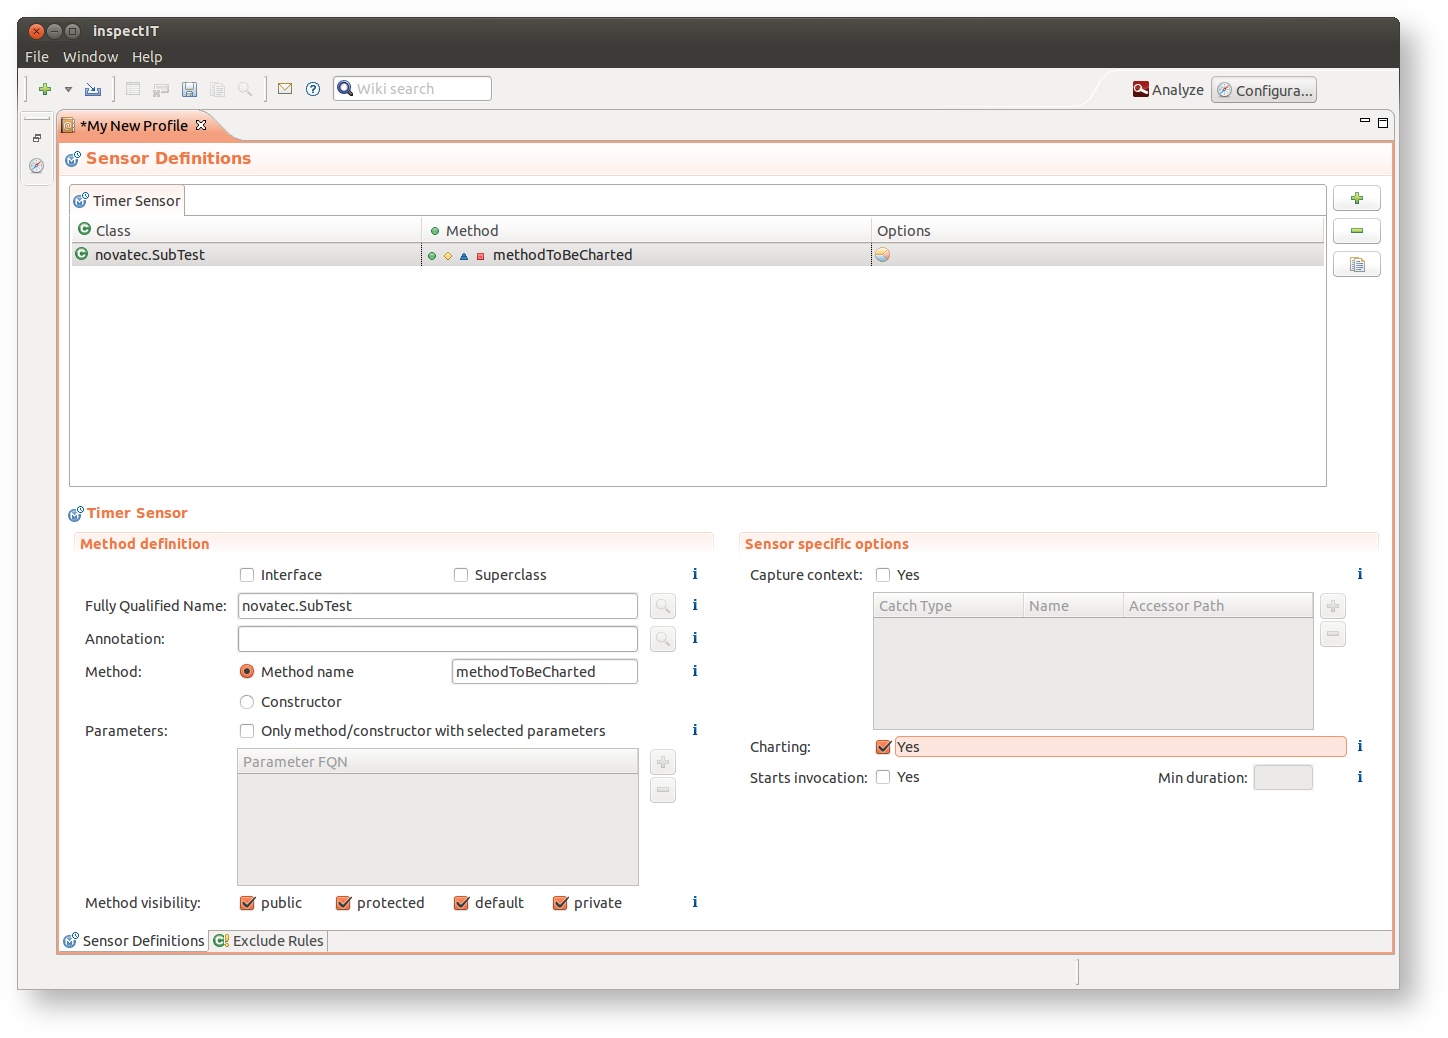
With the charting option it is possible to define what data should be considered as the long-term data available for charting in inspectIT User interface. This data is additionally saved to the database, thus even when the CMR is shutdown or buffer is cleared the data will be available via charts. With this approach it is possible to define exactly what methods performance data should be considered as long-term.
The configuration of the charting option is defined in the sensor assignment for Timer and HTTP sensor:
If the charting option is active the Options column of the sensor assignment table will display this icon: .
Context capturing
Applies to Timer sensor
Please visit the Context capturing in sensor assignment for more information on context capturing option.
Examples
Don't forget to check the Examples page for concrete examples on sensor assignment configuration.


