The build process in inspectIT is based on the tools Ant and ivy (dependency manager). The new build process is tracked as INSPECTIT-51
Migration to Gradle
| Info |
|---|
We are currently working on a migration from Ant to Gradle. You can track the progress here: INSPECTIT-1811 Also see the documentation here: Gradle Build Migration |
completely based on Gradle.
History
With the first realization of the build process, ivy was used heavily to manage all dependencies even those inspectIT submodules created. We recognized that this approach had multiple drawbacks:
- inspectIT subprojects defines other subprojects as dependencies. If you now changed anything within these projects, you first need to create a new release, publish this to ivy and then get the dependency with your initial project again. In addition to that each release was versioned. Local releases which were just created for testing the functionality must have other versions that real releases. This process was very hard and timeconsuming. Thus the build process was not used for development. Still for the release process, everything needed to be published. A step often forgotten, which lead to incorrect integrations.
- The build itself was very complicated and was implemented by three different persons. Lots of documentation was written, but it was just too complex to understand
- Before a release could be started certain projects must be published or else changes would not affect the released version and the like.
General structure
With the new build and release process, the amount of build files is heavily reduced. Each of the three components of inspectit now comes with only one build file. In addition to that the build files are mainly used for release generation and quality assurance tasks. During development a build can and should be started directly within the IDE as always building by ant is to cumbersome (but still possible).
For resolving external dependencies Ivy is used. Ivy doesn't have to be installed by the developer as it is directly downloaded and integrated into the build files. Below is an excert showing the most important tasks with their descriptions.
Component | Results | Important targets |
|---|---|---|
Agent |
|
|
CMR | One release containing start scripts for windows and linux |
|
UI | Two releases: One for windows, one for linux |
|
Commons | Two releases: One normal jar and one for Eclipse plugin projects |
|
CommonsCS | Two releases: One normal jar and one for Eclipse plugin projects |
|
Common targets
Since all of the build files have contained similar build target, all of these build targets were grouped into one shared ant file. This file is located at CMR/resources/shared/common-targets/xml and is imported to every build.xml file. The targets available in the common targets are:
Target | Description | Needed properties |
|---|---|---|
init-ivy | Initializes the Ivy |
|
clean-ivy | Cleans the ivy cache |
|
pmd | Runs the PMD code analysis | build.qa.analysis - Default folder of QA |
checkstyle | Run the Checkstyle code analysis | build.qa.analysis - Default folder of QA |
findbugs | Run the Findbugs code analysis | build.qa.analysis - Default folder of QA |
cpd | Run the CPD code analysis | build.qa.analysis.cpd - CPD folder for QA |
-retrieve-jre-installations | Downloads the JVMs to the local folder if necessary | jvm.list - list of files to be downloaded |
Automated quality assurance
Quality assurance targets are available for all components. Quality assurance is divided in two logical parts: Functional testing and static code analysis. The integration of these code quality tools is tracked in INSPECTIT-68.
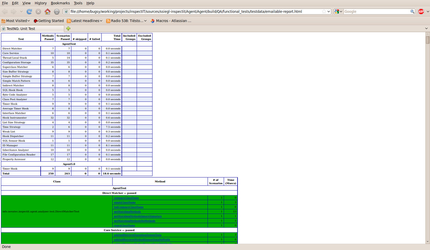
- The target for functional testing includes TestNG based unit and integration tests that also provide code coverage metrics using Cobertura.
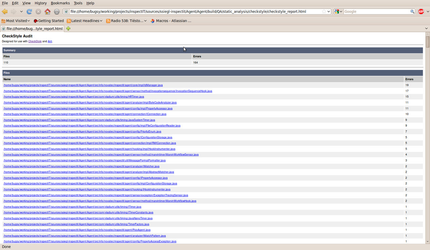
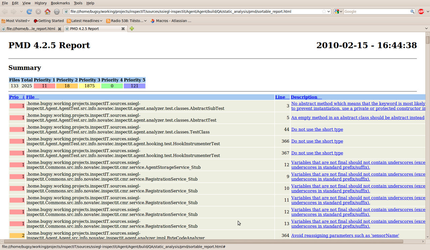
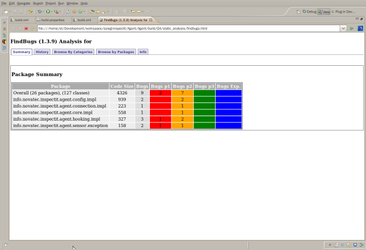
- Static analysis includes the tools checkstyle, PMD and findBugs.
All information is provided as formatted html output that can be viewed during development (in order to check if everything went fine) and is also easily integrated in the continuous integration process of inspectIT.
target | tool | goals | output location | additional settings | example result |
|---|---|---|---|---|---|
functional-test | TestNG | functional tests of the projects | There are two output formats:
|
|
|
functional-test | Coberatura | code coverage of the functional tests |
| currently nothing is defined here |
|
static-analysis | checkstyle | adherence of the code to the inspectIT coding convention |
|
|
|
static-analysis | PMD | static analysis to find common error-prone pattern in java code |
|
|
|
static-analysis | findBugs | static analysis to find common error-prone pattern in java code |
| Thresholds have to be defined on Hudson |
|

UI Build
Build till Eclipse Helios (3.6)
The build for the ui component of inspectIT is not trivial as it depends on the PDE build capacities of Eclipse that are (unfortunately) only little documented and quite hard to read. The initial version of the build was written by Paulo Santos who left Novatec in 2007. During the migration to Jira/Confluence the build process became unstable.
The PDE build is an Ant-based build system for Eclipse RCP applications and Eclipse plugins. This build system is also called headless build because it does not require a running Eclipse UI to create the product. The PDE build system is part of the Eclipse plugin org.eclipse.pde.build. First of all the PDE build requires the RCP Deltapack and an Eclipse 3.6 RCP distribution to run against. The Deltapack contains different plugins and features which are shipped with it. It also contains the very important binaries to create launchers for the different configurations. The Eclipse RCP distribution contains also some important plugins/features which are needed for the PDE build. Both the Deltapack and the Eclipse RCP distribution should be extracted into one folder (in our case it's the "base3.6" folder). There is a lot of overlap between both, but eventually we need all resources. This is not really documented on any PDE build documentation, but is very important! It is also very important to add the plugins/features that are used by the inspectIT RCP client (which are defined in the plugin.xml) to the "base3.6" directory. The second thing that we need is an Eclipse RCP version (this can be the same Eclipse 3.6 RCP distribution as used before) that is used to execute the PDE build. It is mandatory that the Deltapack is not in the Folder of the Eclipse RCP folder, otherwise the build won't run.
The PDE build expects that the build directory contains a "plugins" directory and a "features" directory. These directories should contain the various plug-ins and features to be built. It is very important to note that the build will only recognize that the folders are in fact plugins by the manifest that is provided.
Below are essential details shown concerning the release folder.
...
Configuration
Below is an excerpt of some important settings contained in the build.properties file.
Note that the build.xml and the build.properties are in the release folder of the inspectIT project.
Property | Current Settings | Description |
|---|---|---|
base | release/runtime/base 3.6 | Specifies the root folder of the Deltapack (Deltapack contains the resources from the RCP Deltapack and the Eclipse RCP distribution). The PDE build is running against the deltapack. The Deltapack must contain also the plugins/features needed by inspectIT (which are specified in the plugin.xml). |
baseLocation | release/runtime/base3.6/eclipse | Points to the root folder of Eclipse within the deltapack. |
eclipseLocation | release/runtime/eclipse3.6RCP | This is the Eclipse RCP installation that is used to execute the PDE build. |
buildDirectory | release/pdebuild | The directory into which the build elements are fetched and where the build takes place. |
configs | win32, win32, x86 & | A list of configurations for which the product should be built. |
Here you can find an additional documentation (in german) about packaging RCP applications using the PDE build capabilities of Eclipse.
With the change from PDE Build 3.4 to 3.6 the Eclipse folders are not anymore under version control, but directly located on our FTP. They are automatically downloaded and unpacked to be used for the PDE Build.
Build from Eclipse Indigo (3.7)
From the Eclipse Indigo we have simplified the process of the building the user interface. The folder release/runtime should now contain only one folder, which is called base3.7. This folder is made by combining the Eclipse distribution for the RCP development (http://www.eclipse.org/downloads/download.php?file=/technology/epp/downloads/release/indigo/R/eclipse-rcp-indigo-linux-gtk.tar.gz) and Eclipse delta-pack (http://download.eclipse.org/eclipse/downloads/drops/R-3.7-201106131736/download.php?dropFile=eclipse-3.7-delta-pack.zip). This is all. The folder base3.7 is also available from Hudson (ftp://hudson.novatec-gmbh.de/rcp_build/3.7/base3.7.zip) as zipped file, thus build process will download it if necessary.
From version 3.7 we changed the releases for MacOS. We introduced the 32-bit and 64-bit UI versions based on Cocoa API.
3rd Party plugins
All the 3rd party plugins that are necessary for the build (except core Eclipse plugins and Delta pack plugins) prior to executing PDE build have to be placed in the
| Code Block |
|---|
${buildDirectory}/plugins |
folder. This location is explicitly specified in the build.properties of inspectIT as the directory where the additional plugins required are placed. The option is specified by defining the pluginPath in build properties:
| Code Block |
|---|
pluginPath=${buildDirectory}/plugins |
findBugs in the UI Build
When findBugs is run in the UI Build it complains about missing classes (such like different Eclipse plugins). When classes are missing then findBugs can't analyze the code that accurate. Adding the missing classes to the findBugs classpath isn't the best solution as we would need to define these dependencies in the ivy file. The current decision was to not adapt the ivy file as it's not worth doing it only for findBugs. Also we would need to adapt the version of these dependencies every time we change the Eclipse version. Should this decision be changed in the near future, then all we have to do is to define a new Ivy configuration and the missing dependencies. Below is a list of the dependencies needed for findBugs.
| Code Block |
|---|
<!-- Eclipse plugins especially needed for findBugs, otherwise findBugs will not be able to produce results that are as accurate as possible -->
<dependency org="org.eclipse.swt.gtk.linux" name="x86" rev="3.3.0-v3346" />
<dependency org="org.eclipse" name="jface" rev="3.3.0-I20070606-0010" />
<dependency org="org.eclipse.ui" name="forms" rev="3.3.0-v20070511" />
<dependency org="org.eclipse.equinox" name="common" rev="3.3.0-v20070426" />
<dependency org="org.eclipse.core" name="runtime" rev="3.3.100-v20070530" />
<dependency org="org.eclipse.ui" name="workbench" rev="3.3.0-I20070608-1100" />
<dependency org="org.eclipse.core" name="commands" rev="3.3.0-I20070605-0010" />
<dependency org="org.eclipse.core" name="expressions" rev="3.3.0-v20070606-0010" />
<dependency org="org.eclipse.equinox" name="preferences" rev="3.2.100-v20070522" />
<dependency org="org.eclipse.equinox" name="registry" rev="3.3.0-v20070522" />
<dependency org="org.eclipse.equinox" name="app" rev="1.0.0-v20070606" />
<dependency org="org.mod4j.org.eclipse" name="jface" rev="3.5.0" />
<dependency org="org.eclipse.core" name="jobs" rev="3.3.0-v20070423" />
<dependency org="org.eclipse" name="osgi" rev="3.3.0-v20070530" />
<dependency org="org.eclipse.core.runtime.compatibility" name="auth" rev="3.2.100-v20070502" /> |
Build with more plug-in projects
When building more plug-ins together it is important that each plug-in specifies the correct class-path in the MANIFEST.MF. If plug-in is using any external libraries they have to be included here otherwise, the build will fail. *Furthermore, if any external library is included, then also the class-path has to include the project it-self, by having the
| Code Block |
|---|
. |
entry in the class-path. This has to be explicitly specified.*
Problem with Windows icons
The problem with icons for the inspectIT.exe file in the Windows version has been solved. However, it's possible that with new Eclipse versions (currently with 3.7 is working) there are again the problems with the icons. Here are the steps to solve the problem:
- Don't use the 6 .bmp images in the widows launcher branding (in inspectIT.product) because it simply is not correct and can never ever work!
Use the option to specify the .ico file. Note that the path of the .ico file should be in form
Code Block plugin.id/icons/file.icoalthough the inspectIT.product editor will complain that this product does not exist. Ignore this warning!
- Currently, the .ico file has 7 .bmp inside, however Eclipse can change the needed icons from version to version. These ones are currently required:
- 48x48 8bit bitmap
- 32x32 8bit bitmap
- 24x24 8bit bitmap
- 16x16 8bit bitmap
- 48x48 32bit bitmap
- 32x32 32bit bitmap
- 16x16 32bit bitmap
- If the new versions require different set of .bmp icons in the .ico file, we will need new .ico file!
- First find out what is the needed set. For this you need original eclipse.ico file. This file is located in the launcher.zip file and this file you can find in the org.eclipse.platform.source_x.x.x.jarfile. The jar file can be found:
- Probably in the eclipse/plugins folder, but not necessary.
- If not, go to eclipse release page like this http://download.eclipse.org/eclipse/downloads/drops/R-3.7.1-201109091335/index.php. There download the org.eclipse.platform.source-3.7.1.zip file from the Platform SDK section. In this zip, the jar has to be.
- Download the Junior Icon Editor (only Win version available).
- Open the eclipse.ico file and on the right side there will be all the needed .bmp icons
- Create a new icon with the toll and import one of the .bmp files we have. I suggest to use the one with most colors and biggest.
- Duplicate the imported .bmp inspectIT icon as menu times as there are icons in the eclipse.ico file
- Use convert option to convert each .bmp icon to the same colors/size as in eclipse.ico. I don't know if the order of the .bmps has to be the same, but as it working now, contain the same order as in eclipse.ico file.
| Tip | ||
|---|---|---|
| ||
The icon for the Mac OS has to be in the .icns format. You can use iConvertIcons to convert any image to this and other formats. |
What we want to have in the new build
...
From a general point of view, each project we have does have a single .gradle file defining some specific tasks and executions for this single project. Furthermore, there are generic definitions in the root folder of the repository combining all tasks and library dependencies which are needed by the sub-projects.
To execute any kind of build from the command line, you just need to either execute the gradlew for linux or gradlew.bat for windows file. An overview over all available tasks can be retrieved via:
| Code Block | ||||
|---|---|---|---|---|
| ||||
$ ./gradlew tasks |
Below is an excert showing the most important tasks with their descriptions (all executed from the root project):
Component | Important targets |
|---|---|
| inspectit.root |
|
inspectit.agent.java |
|
inspectit.server |
|
inspectit.ui.rcp |
|
inspectit.shared.all |
|
inspectit.shared.cs |
|
| Info |
|---|
All of the mentioned inspectit.root targets can be executed, too, for each project alone. Just prepend the project name with :<project-name> and afterwards define the name of the task, e.g. :inspectit.server:clean |
Automated quality assurance
Quality assurance targets are available for all components. Quality assurance is divided in two logical parts: Functional testing and static code analysis.
- The target for functional testing includes TestNG based unit and integration tests that also provide code coverage metrics using Cobertura.
- Static analysis includes the tools checkstyle, PMD and FindBugs.
All information is provided as formatted html output that can be viewed during development (in order to check if everything went fine) and is also easily integrated in the continuous integration process of inspectIT.
target | tool | goals | output location | example result |
|---|---|---|---|---|
test | TestNG | functional tests of the projects | There are two output formats:
The results can be found in the build folders at <subproject>/build/QA/functional_tests |
|
test | Coberatura | code coverage of the functional tests |
|
|
analyze | checkstyle | adherence of the code to the inspectIT coding convention |
|
|
analyze | PMD | static analysis to find common error-prone pattern in java code |
|
|
analyze | findBugs | static analysis to find common error-prone pattern in java code |
|
|
UI Build
Build till Eclipse Helios (3.6)
The build for the ui component of inspectIT is not trivial as it depends on the PDE build capacities of Eclipse that are (unfortunately) only little documented and quite hard to read. The initial version of the build was written by Paulo Santos who left Novatec in 2007. During the migration to Jira/Confluence the build process became unstable.
The PDE build is an Ant-based build system for Eclipse RCP applications and Eclipse plugins. This build system is also called headless build because it does not require a running Eclipse UI to create the product. The PDE build system is part of the Eclipse plugin org.eclipse.pde.build. First of all the PDE build requires the RCP Deltapack and an Eclipse 3.6 RCP distribution to run against. The Deltapack contains different plugins and features which are shipped with it. It also contains the very important binaries to create launchers for the different configurations. The Eclipse RCP distribution contains also some important plugins/features which are needed for the PDE build. Both the Deltapack and the Eclipse RCP distribution should be extracted into one folder (in our case it's the "base3.6" folder). There is a lot of overlap between both, but eventually we need all resources. This is not really documented on any PDE build documentation, but is very important! It is also very important to add the plugins/features that are used by the inspectIT RCP client (which are defined in the plugin.xml) to the "base3.6" directory. The second thing that we need is an Eclipse RCP version (this can be the same Eclipse 3.6 RCP distribution as used before) that is used to execute the PDE build. It is mandatory that the Deltapack is not in the Folder of the Eclipse RCP folder, otherwise the build won't run.
The PDE build expects that the build directory contains a "plugins" directory and a "features" directory. These directories should contain the various plug-ins and features to be built. It is very important to note that the build will only recognize that the folders are in fact plugins by the manifest that is provided.
Configuration
Below is an excerpt of some important settings contained in the build.properties file.
Property | Current Settings | Description |
|---|---|---|
baseLocation | build/eclipse/base/eclipse | Points to the root folder of Eclipse within the deltapack. |
buildDirectory | inspectit.ui.rcp/build/pdebuild | The directory into which the build elements are fetched and where the build takes place. |
configs | win32, win32, x86 & | A list of configurations for which the product should be built. |
Here you can find an additional documentation (in german) about packaging RCP applications using the PDE build capabilities of Eclipse.
With the change from PDE Build 3.4 to 3.6 the Eclipse folders are not anymore under version control, but directly located on our FTP. They are automatically downloaded and unpacked to be used for the PDE Build.
Build from Eclipse Indigo (3.7)
From the Eclipse Indigo we have simplified the process of the building the user interface. The folder release/runtime should now contain only one folder, which is called base3.7. This folder is made by combining the Eclipse distribution for the RCP development (http://www.eclipse.org/downloads/download.php?file=/technology/epp/downloads/release/indigo/R/eclipse-rcp-indigo-linux-gtk.tar.gz) and Eclipse delta-pack (http://download.eclipse.org/eclipse/downloads/drops/R-3.7-201106131736/download.php?dropFile=eclipse-3.7-delta-pack.zip). This is all. The folder base3.7 is also available from Hudson (ftp://hudson.novatec-gmbh.de/rcp_build/3.7/base3.7.zip) as zipped file, thus build process will download it if necessary.
From version 3.7 we changed the releases for MacOS. We introduced the 32-bit and 64-bit UI versions based on Cocoa API.
3rd Party plugins
All the 3rd party plugins that are necessary for the build (except core Eclipse plugins and Delta pack plugins) prior to executing PDE build have to be placed in the
| Code Block |
|---|
${buildDirectory}/plugins |
folder. This location is explicitly specified in the build.properties of inspectIT as the directory where the additional plugins required are placed. The option is specified by defining the pluginPath in build properties:
| Code Block |
|---|
pluginPath=${buildDirectory}/plugins |
findBugs in the UI Build
When findBugs is run in the UI Build it complains about missing classes (such like different Eclipse plugins). When classes are missing then findBugs can't analyze the code that accurate. Adding the missing classes to the findBugs classpath isn't the best solution as we would need to define these dependencies in the ivy file. The current decision was to not adapt the ivy file as it's not worth doing it only for findBugs. Also we would need to adapt the version of these dependencies every time we change the Eclipse version. Should this decision be changed in the near future, then all we have to do is to define a new Ivy configuration and the missing dependencies. Below is a list of the dependencies needed for findBugs.
| Code Block |
|---|
<!-- Eclipse plugins especially needed for findBugs, otherwise findBugs will not be able to produce results that are as accurate as possible -->
<dependency org="org.eclipse.swt.gtk.linux" name="x86" rev="3.3.0-v3346" />
<dependency org="org.eclipse" name="jface" rev="3.3.0-I20070606-0010" />
<dependency org="org.eclipse.ui" name="forms" rev="3.3.0-v20070511" />
<dependency org="org.eclipse.equinox" name="common" rev="3.3.0-v20070426" />
<dependency org="org.eclipse.core" name="runtime" rev="3.3.100-v20070530" />
<dependency org="org.eclipse.ui" name="workbench" rev="3.3.0-I20070608-1100" />
<dependency org="org.eclipse.core" name="commands" rev="3.3.0-I20070605-0010" />
<dependency org="org.eclipse.core" name="expressions" rev="3.3.0-v20070606-0010" />
<dependency org="org.eclipse.equinox" name="preferences" rev="3.2.100-v20070522" />
<dependency org="org.eclipse.equinox" name="registry" rev="3.3.0-v20070522" />
<dependency org="org.eclipse.equinox" name="app" rev="1.0.0-v20070606" />
<dependency org="org.mod4j.org.eclipse" name="jface" rev="3.5.0" />
<dependency org="org.eclipse.core" name="jobs" rev="3.3.0-v20070423" />
<dependency org="org.eclipse" name="osgi" rev="3.3.0-v20070530" />
<dependency org="org.eclipse.core.runtime.compatibility" name="auth" rev="3.2.100-v20070502" /> |
Build with more plug-in projects
When building more plug-ins together it is important that each plug-in specifies the correct class-path in the MANIFEST.MF. If plug-in is using any external libraries they have to be included here otherwise, the build will fail. *Furthermore, if any external library is included, then also the class-path has to include the project it-self, by having the
| Code Block |
|---|
. |
entry in the class-path. This has to be explicitly specified.*
Problem with Windows icons
The problem with icons for the inspectIT.exe file in the Windows version has been solved. However, it's possible that with new Eclipse versions (currently with 3.7 is working) there are again the problems with the icons. Here are the steps to solve the problem:
- Don't use the 6 .bmp images in the widows launcher branding (in inspectIT.product) because it simply is not correct and can never ever work!
Use the option to specify the .ico file. Note that the path of the .ico file should be in form
Code Block plugin.id/icons/file.icoalthough the inspectIT.product editor will complain that this product does not exist. Ignore this warning!
- Currently, the .ico file has 7 .bmp inside, however Eclipse can change the needed icons from version to version. These ones are currently required:
- 48x48 8bit bitmap
- 32x32 8bit bitmap
- 24x24 8bit bitmap
- 16x16 8bit bitmap
- 48x48 32bit bitmap
- 32x32 32bit bitmap
- 16x16 32bit bitmap
- If the new versions require different set of .bmp icons in the .ico file, we will need new .ico file!
- First find out what is the needed set. For this you need original eclipse.ico file. This file is located in the launcher.zip file and this file you can find in the org.eclipse.platform.source_x.x.x.jarfile. The jar file can be found:
- Probably in the eclipse/plugins folder, but not necessary.
- If not, go to eclipse release page like this http://download.eclipse.org/eclipse/downloads/drops/R-3.7.1-201109091335/index.php. There download the org.eclipse.platform.source-3.7.1.zip file from the Platform SDK section. In this zip, the jar has to be.
- Download the Junior Icon Editor (only Win version available).
- Open the eclipse.ico file and on the right side there will be all the needed .bmp icons
- Create a new icon with the toll and import one of the .bmp files we have. I suggest to use the one with most colors and biggest.
- Duplicate the imported .bmp inspectIT icon as menu times as there are icons in the eclipse.ico file
- Use convert option to convert each .bmp icon to the same colors/size as in eclipse.ico. I don't know if the order of the .bmps has to be the same, but as it working now, contain the same order as in eclipse.ico file.
| Tip | ||
|---|---|---|
| ||
The icon for the Mac OS has to be in the .icns format. You can use iConvertIcons to convert any image to this and other formats. |
Lessons learned
With the first realization of the build process, ivy was used heavily to manage all dependencies even those inspectIT submodules created. We recognized that this approach had multiple drawbacks:
...