This tutorial is provides a step by step creation of an IzPack Installer. You will be creating a simple swing based application.
| Table of Contents |
|---|
Object
Create an IzPack Installer using following tools: IzPack, Ant, Bash for GNU/Linux and Microsoft Windows 7.
...
- Make sure you're in your new created project folder.
- Go to the source folder (src).
- Create a Java Class (name used in tutorial: HelloWorld).
- Paste the source code block down below to your new created class. This source code is a simple swing based dialog with a PushButton.
- Compile and run it.
| Code Block | ||||||||
|---|---|---|---|---|---|---|---|---|
| ||||||||
import java.awt.event.ActionEvent;
import java.awt.event.ActionListener;

import javax.swing.JButton;
import javax.swing.JFrame;
import javax.swing.JPanel;
import javax.swing.SwingUtilities;

public class HelloWorld extends JFrame {

    public HelloWorld() {
        initUI();
    }

    public final void initUI() {

       JPanel panel = new JPanel();
       getContentPane().add(panel);

       panel.setLayout(null);

       JButton quitButton = new JButton("Hello World");
       quitButton.setBounds(50, 60, 120, 30);
       quitButton.addActionListener(new ActionListener() {
           public void actionPerformed(ActionEvent event) {
               System.exit(0);
          }
       });

       panel.add(quitButton);

       setTitle("Hello World");
       setSize(300, 200);
       setLocationRelativeTo(null);
       setDefaultCloseOperation(EXIT_ON_CLOSE);
    }

    public static void main(String[] args) {
        SwingUtilities.invokeLater(new Runnable() {
            public void run() {
                HelloWorld ex = new HelloWorld();
                ex.setVisible(true);
            }
        });
    }
} |
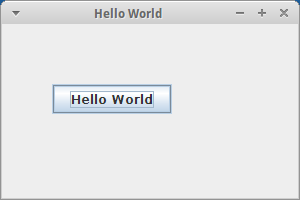
This dialog should popup on the screen:
Step 4. - Create An Ant Script
- Highlight your project folder .Execute and execute the shortkey CTRL+N.
- Go to XML folder and choose XML File.
- Name this XML File (build.xml)
- Paste the xml code down below to build.xml
...
- Run the IzPack jar file (java -jar /path/to/IzPack/Jar)
- Follow the installation instructions. Remember the directory where the IzPack Installer Framework has been installed (installation path used in tutorial: /home/user/Desktop/IzPack).
- Create two directories. The first directory for the IzPack setting file for the creational process and the second directory for the created generated installer (used in tutorial: /home/user/Desktop/Files4Installer and /home/user/Desktop/HelloWorld).
...
| Info | ||||||||
|---|---|---|---|---|---|---|---|---|
| This is a small explanation
| file. |||||||
|
| Note |
|---|
Common mistakes:
|
...
| Note |
|---|
Common mistakes:
|
...
TODO: Create two files in this directory /home/user/Desktop/Files4Installer.
...
